So you want that flawless chrome-like finish on your plastic parts. The kind that looks like it came straight off a luxury car assembly line. Most people focus on the vacuum metalising machine, the deposition rate or the metal target.
But in reality, the primer coat is where it all starts. If that layer is wrong, the finish quality usually falls apart before the metal layer even has a chance to perform. So let's talk about it properly.
Why Primer Coats Actually Matter
Think of it this way. You're trying to deposit a super thin layer of metal, aluminium usually onto a plastic surface. That surface is not naturally going to bond well with metal.
Plastics are smooth, sometimes waxy, often have release agents from the moulding process sitting right on top. These aren't random variables — they're direct outputs of how the part was moulded.
Understanding what injection molding tolerances and surface conditions engineers can expect during manufacturing helps explain why primer selection can't be treated as a one-size-fits-all decision
The primer's job is to:
- Create a microscopically smooth base so the metal film has something uniform to sit on
- Improve adhesion between the plastic substrate and the metallic layer
- Seal any surface imperfections such as micro-pores, flow lines, sink marks
- Protect against outgassing, which absolutely destroys metal film quality inside the vacuum chamber
What Functions Do Primers Serve Between Plastic Substrates and Metallic Topcoats?
This is a question we get a lot. Here's the full picture:
- Adhesion promotion: Primers contain functional groups that chemically anchor to both the plastic and the metal film
- Surface energy modification: Important for low surface energy plastics like PP or PE
- Levelling: They fill tiny surface irregularities so the metal layer looks mirror-smooth
- Barrier function: Prevents plasticisers or mould release agents from migrating up and contaminating the metal film
Epoxy vs PU Primers: Which One for Metallized Finishes?
There's no one-size-fits-all answer here, but broadly speaking:
Epoxy primers are harder, more chemical resistant, and bond extremely well to many engineering plastics like ABS, PC, and PC-ABS blends. They are a good choice when the final part is going to face chemical exposure or mechanical wear.
PU (polyurethane) primers are more flexible. If your plastic part has any flex to it, such as automotive interior trims, PU is often the better option because it is less likely to crack. So for flexible substrates, PU is almost always the better call.
Case Study:
Problem: One of the automotive clients was getting micro-cracks in the metallic coating on their interior door handle bezels. They'd been using epoxy primers.
Opportunity: The manufacturer switched them to a two-component PU system.
Result: The problem vanished completely.
Primer Chemistries for Low Surface Energy Plastics
PP, PE, TPO are nightmares for adhesion. Their surface energy is so low that most coatings just don't want to stick.
Options that actually work:
- Chlorinated polyolefin (CPO) primers, specifically designed for PP and PE, create a bridge between the plastic and the coating.
- Adhesion promoters combined with primer might lead to a quick wipe with an adhesion promoter before priming is enough.
- Flame or plasma treatment before priming modifies the surface to increase energy.
We've had good results with CPO-based primers for vacuum metalising applications on polypropylene bumper components. The adhesion improvement is significant and measurable.
How Thick Should the Primer Layer Be?
Too thin and you don't get proper coverage and adhesion. Too thick and you introduce internal stresses, solvent trapping, and orange peel texture.
Typical guidance:
- Wet film thickness: 15-25 microns for most UV-cure base coats
- Dry film: usually 8-15 microns after curing
- Consistency: Consistent thickness across the entire part. Inconsistency shows up horribly once the metal is deposited.
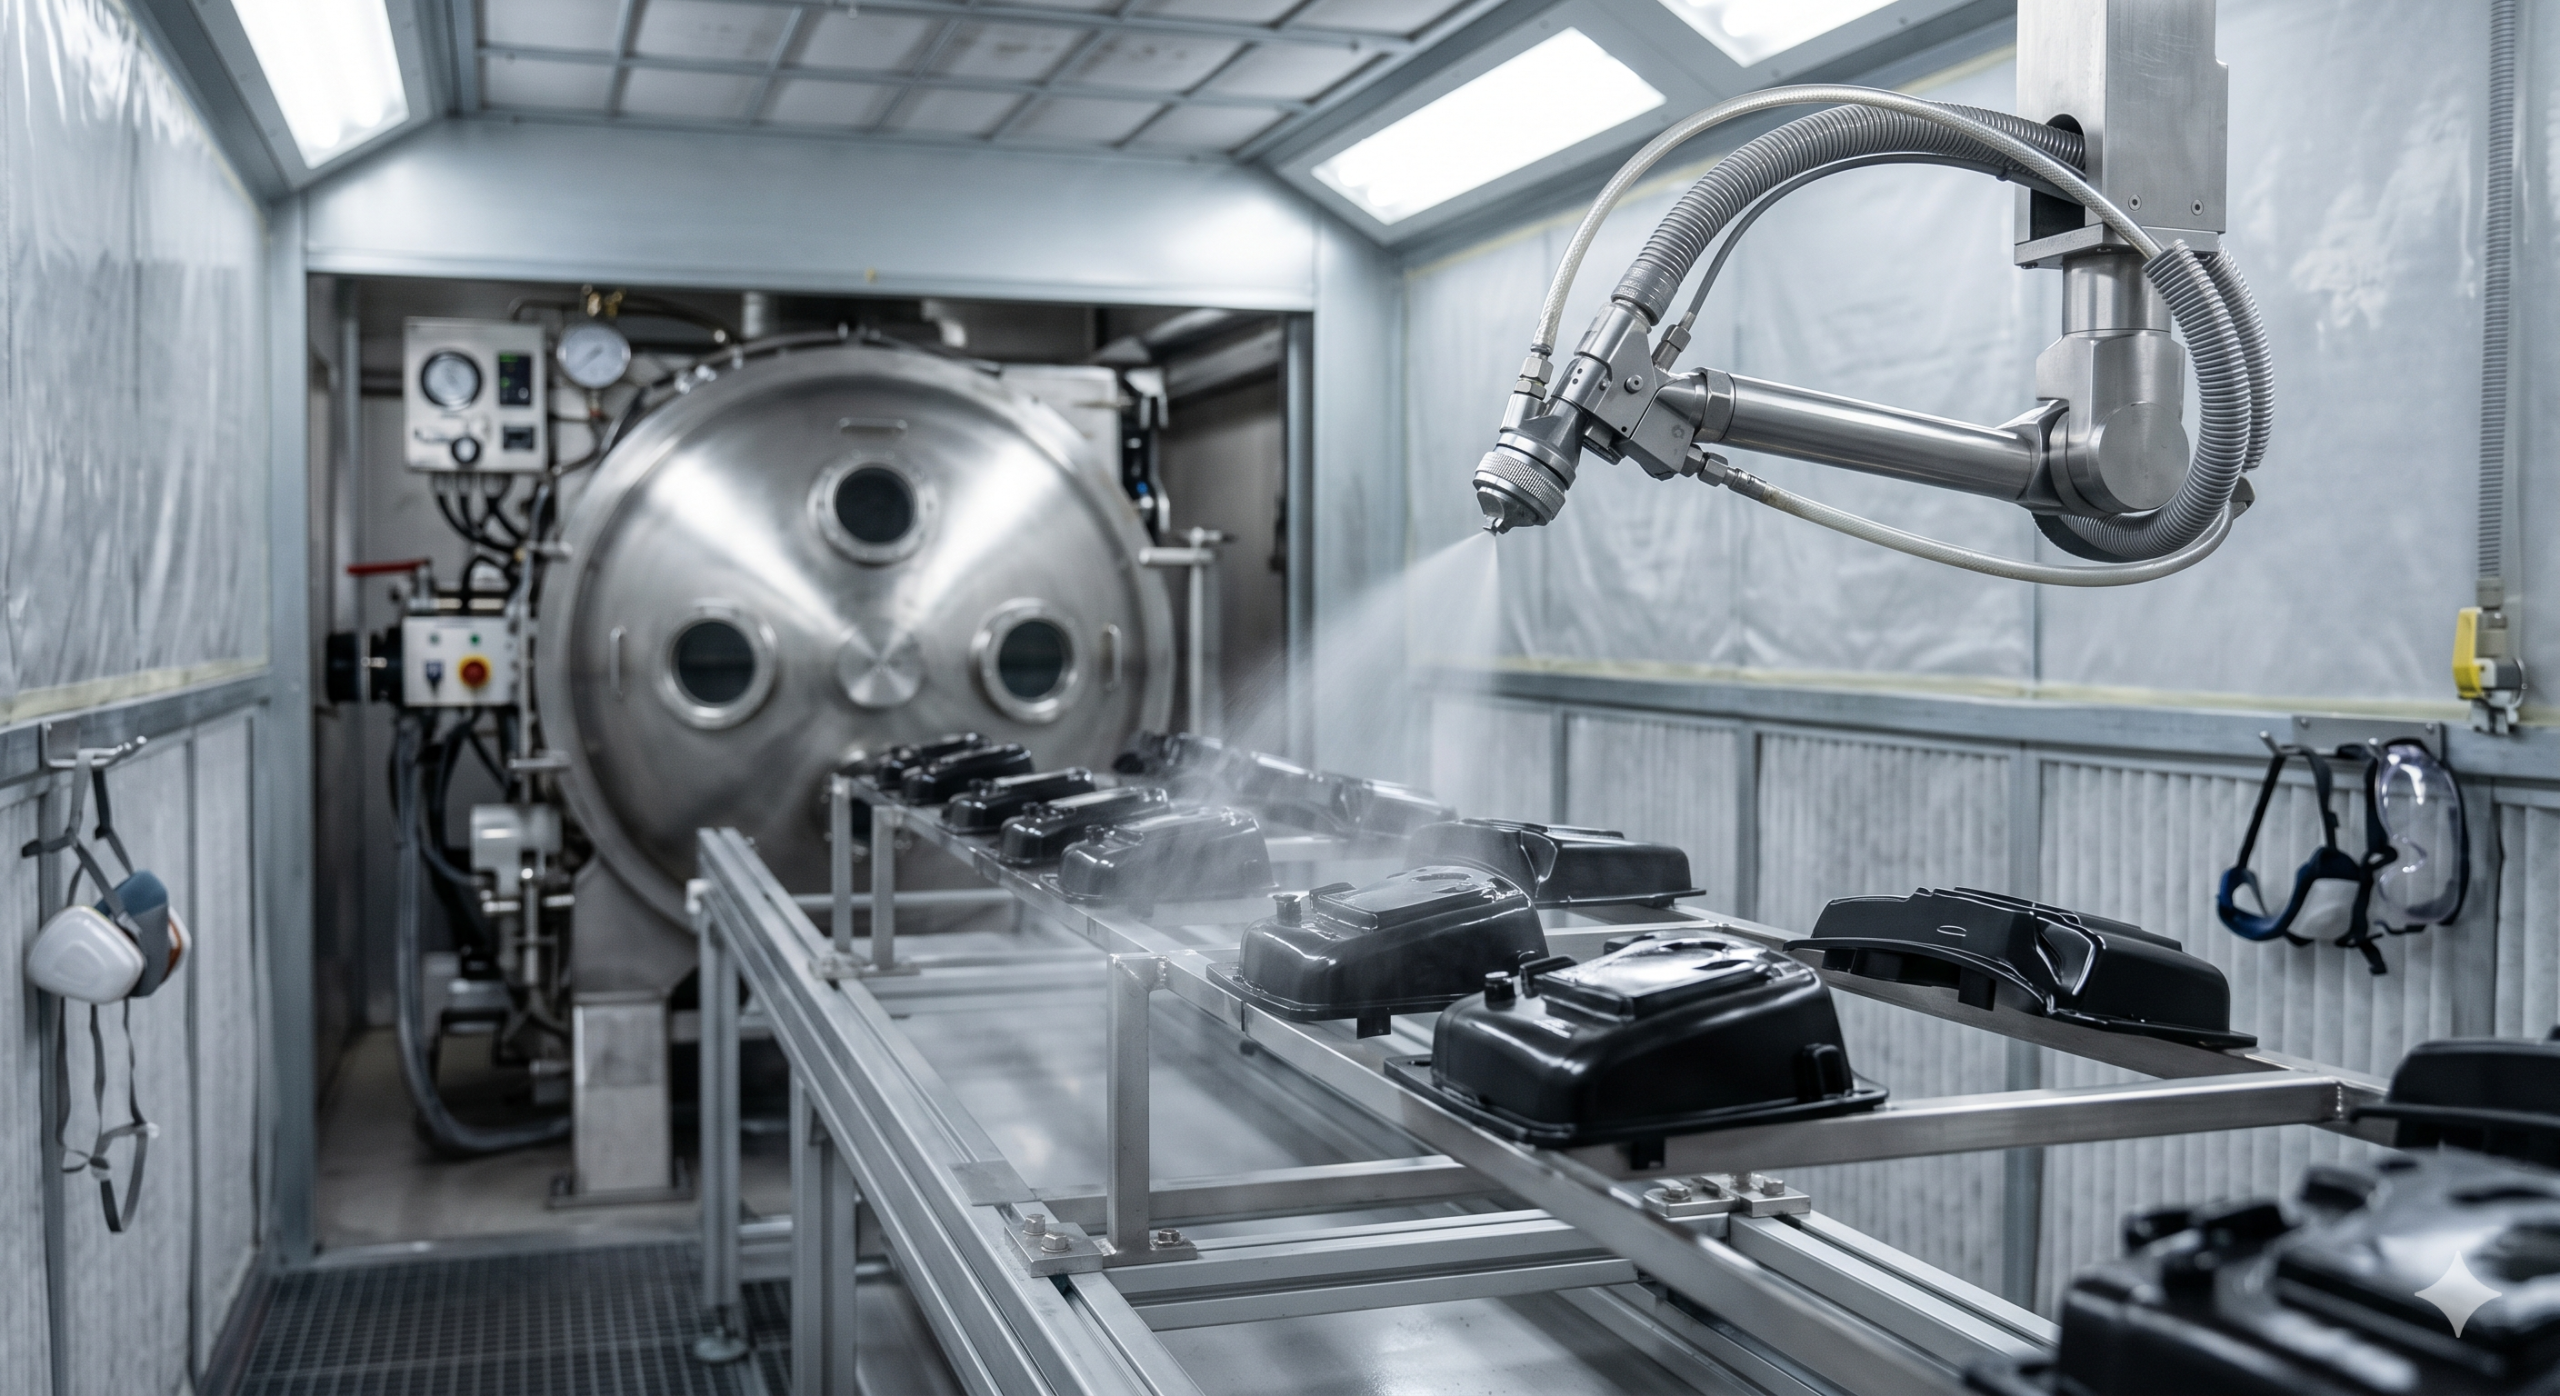
In our pad printing on plastic and vacuum metalizing process lines, we use automated spray with real-time film thickness monitoring. Manual spray booths can work, but the operator needs serious experience.
How Long to Wait Between Primer Cure and Vacuum Metallizing?
This one trips people up. You cure the primer, everything looks fine, and you rush it into the metallizing chamber.
Even after UV cure or thermal cure, primers can still off-gas trace solvents. Inside a vacuum chamber, this is catastrophic as it creates a contaminated atmosphere and the metal film deposits poorly, with adhesion issues and haze. To understand the full deposition process that the primer is preparing for, see how vacuum metallizing works with injection molded plastic components.
Recommended practice:
- After UV cure: Minimum 30 minutes room temperature rest, ideally 2 hours
- After thermal cure (oven): Allow to cool fully and rest for 1-2 hours
- Humidity and temperature: If your production area is humid, give it longer
Always do a spot check on adhesion before batching parts into the metallizer
How Primers Affect Final Colour and Reflectivity
This is underappreciated. The primer colour matters for the final look:
- White or light grey primers give a brighter, cleaner chrome effect
- Dark primers can be used for coloured metallic effects
- Matte primers will give a lower reflectivity which are useful for satin finishes
- Any imperfections in the primer surface will show through the metal. The metal amplifies everything.
Primer coats are the foundation of the entire coating system. They determine whether your metal layer lasts or fails under stress.
By getting the chemistry right, controlling your thickness, respecting curing timelines, and tailoring your approach to the substrate, your metallized coatings will look and perform more premium.
At Rustagi Polymers, we've been doing metal plastic coating and vacuum metalizing processes for decades.
FAQs
1.What functions do primers serve between plastic substrates and metallic topcoats?
Primers act as a bridge layer which further improves adhesion, smooths out surface defects and modifies surface energy while preventing contaminants.
2. How do epoxy primers compare with PU primers for metallized finishes?
- Epoxy primers offer strong adhesion, hardness, and chemical resistance. This makes them ideal for rigid plastics and high-wear environments.
- PU primers are more flexible and better suited for parts that experience bending.
3. What primer chemistries are recommended for low-surface-energy plastics?
For plastics like PP, PE, and TPO, chlorinated polyolefin (CPO) primers are highly effective.
4. How thick should primer layers be to avoid orange peel yet maintain adhesion?
A wet film thickness of 15–25 microns typically works well to maintain thickness.
5. How long should you wait between primer cure and vacuum metallizing or topcoat application?
After UV curing, allow at least 30 minutes, ideally up to 2 hours. For thermally cured primers, let parts cool and rest for 1–2 hours.
6. What accelerated tests validate primer-to-metal coating adhesion?
Common tests include cross-hatch adhesion (tape test), humidity exposure, thermal cycling, and salt spray testing.
7. How do primers affect the final colour and reflectivity of metallized coatings?
Primer colour and finish directly influence the final look. Light-coloured primers enhance brightness and chrome clarity, while darker bases create tinted metallic effects.